Possibly not a lot is written about decorating because it
is often taken for granted that everyone knows how to decorate
a room.
Generally the hardest part is choosing the colours and finishes
you want to use. Provided you have not chosen anything too
complicated then it should be straight forward.
Empty the room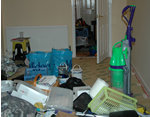
Start by empting the room as much as you can because having to work around furniture is often difficult, time consuming and there is a risk of damaging furnishings with paint.
Remove the old wall paper
 If
the room has already been papered then this needs removing.
If a vinyl paper has been used you need to pull off the top
surface because you need to get to the paper surface to apply
water to completely remove it. Soak the paper several times
and it should scrape off easily. Steam wall paper removers
make the job much easier and are better for papers that have
been painted with emulsion.
If
the room has already been papered then this needs removing.
If a vinyl paper has been used you need to pull off the top
surface because you need to get to the paper surface to apply
water to completely remove it. Soak the paper several times
and it should scrape off easily. Steam wall paper removers
make the job much easier and are better for papers that have
been painted with emulsion.
Prepare the surfaces
Once the paper has been removed then fill in any cracks in the walls with an interior quality plaster filler. When dry sand down to a smooth finish. Paintwork will also need to be rubbed down and again fill any cracks. Wash the walls with a sugar soap solution to remove any residual paste.
Now you are past the boring part and are ready to start the more interesting task of decorating the room with the satisfaction of seeing the room start to improve.
Getting started
The ceiling is the first surface to start painting. A roller is generally the easiest way to cover the surface and if possible use a roller with an extended handle then you not need any ladders to stand on except for the edges. At the edges because it is difficult to use the roller close to the wall you will need to use a paint brush.
Painting
Many emulsion paints cover well with one coat but sometimes
two coats are necessary to achieve a good solid finish.
Satisfied with the ceiling you can move on to the walls and
woodwork. Undercoat the wood surfaces first and then finish
with a gloss paint or other texture. If you are planning to
emulsion the walls you may wish to apply one coat to the walls
before finishing the wood gloss paint this gives you an opportunity
to cover over any paint which as splashed on the undercoat.
If you are papering the room you need to complete all the painted surfaces before you commence papering.
Papering tips
If you have never papered a room before it may seem an onerous task. So here are a few tips.
- Don’t use the cheapest paper because it will probably be the more difficult to hang.
- If the paper has a matching pattern then ensure you have ordered enough paper and are familiar with the pattern before you start. So often you think you know how the pattern is repeated only to stand back and look at a completed wall to find that there are two possibilities for matching and you have used both.
Start papering the at the most visual point of the room so
that you leave the join which may not match in areas not often
looked at. Measure a vertical line down the wall at a distance
equal to the width of a role of paper. This gives you a straight
line to slide the paper to when hanging. Cut off a length
of paper to the height of the wall plus extra for trimming.
Using a pasting table start pasting the bottom of the paper
first. Then fold the bottom 900mm section of the paper over
bringing the two pasted sides together to allow you to more
easily handle the paper. Then move the paper along the table
and paste the top section.
Using a strong chair or pair of steps place the paper on the
wall starting at the top and align to your vertical pencil
mark. With a paper brush gently brush down the paper and work
out to the edges and trim off the top section. Pull out the
two pasted surfaces and now allow the paper to drop and hang
naturally. Check that it is aligned to the marker line and
brush out and trim as for the top section.
With the first piece of paper up it is now a simple job to use the edge of the paper as the straight line and work away either to the right or left side. Remember to match the paper if appropriate as you apply each new length to the wall.
Turning the corner
Turning the walls is the next tricky step. Lets assume that the gap from the last piece of paper is 350mm to the adjoining wall. First check the dimension over the whole length of wall. It would be a miracle if it were parallel, as not many houses have perfectly straight walls. Check the widest dimension add 5mm to allow turning the corner and cut off the a vertical strip of paper say 355mm, paste and hang as before. Now with the remaining piece of paper will be about 150mm wide, measure a straight line on the wall at this distance from the finished wall. Paste the paper and hand aligning to the mark and pattern of the paper. Now you have turned the corner. When papering around a wall like a chimney breasts don’t cut the paper vertically but wrap around ideally starting with the side needing the majority of the paper.
Power points and switches
At power points and switches you must isolate the electrical supply at the mains distribution consumer unit. Hang the paper over the switch or socket and cut the paper in a star formation and trim 3mm smaller than the cover plate. Loosen the screw of the fitting cover plate and with a brush tuck the paper under the edge of the cover and then retighten the screws wipe off any surplus paste restore the power and test.
Papering around windows
For papering around windows it is easier to show this in the diagram below.

Air bubbles
With the papering complete you need to allow the walls to dry for a day. Sometimes you may see air bubbles in the paper even though you are convinced that you evenly brushed the paper to the walls. This can happen sometimes and usually the bubbles disappear as the paper dries out.
It is important that you don’t apply too much heat
to a room that has just been papered because it can affect
the way the paper tensions up during drying.
With the ceiling and wall complete you are left with the floor
finishes and curtain tracks to fit and then the room is complete
for re-occupation.
The finished room